Holy Macaroni Salad!

With summer in view and the smell of burgers and hot dogs fresh off the grill in the air, it’s time to visit one of my favorite dishes to accompany those delectable savory summer treats: macaroni salad!


Yes–macaroni salad. You can load your protein with all the flavor in the world and the best part about a nice, cold & creamy macaroni salad is the way it instantly cools whatever you eat. Spicy food? Macaroni salad. Too much acid with ketchup or mustard? Macaroni salad. You haven’t let the meat cool down enough before you bit into it? Again, macaroni salad.


Now I have spent literal YEARS on trying to perfect the combo. Whether it be trying more of an Italian dressing style (regular and creamy, I have tried them both) or even cutting the mayo with other tasty ingredients, no two salads have been the same. I have varied up the ingredients with carrots, black olives, celery, various types of peppers and onions, even deli meat. What’s best about a decent macaroni salad is you get to experiment with whatever you have on hand to throw in–it’s hard to go wrong if you stick to the basics!


And last month as I was starting to experiment again with my tried and true summer side dish I finally had an epiphany….and got to work on what I would consider my ultimate macaroni salad. I have found that mayonnaise works best as a base in this, but it always needs a little kick. So while I have cut my mayonnaise with sour cream to provide an even creamier texture, I found that also adding some Dijon mustard is an easy way to punch up the flavor. And to make sure that the Dijon doesn’t overpower the mixture too much, also make sure to add in a pinch or two of sugar. A little bit of sweetness goes a long way and will bring out the savory and cut the bite.


Also super important–make sure to make more of your dressing mixture right before you serve! Pasta loves to soak up all the dressing when you first make it and set it to cool in the fridge, so you will always need to make sure you have more dressing to add right before you serve it. If you add enough that second time, you won’t need to add more later for leftovers. Also, if you’re like me, you’ll be snacking on a bowl of leftovers at some point during the week. And as always, enjoy!


IMG_4567

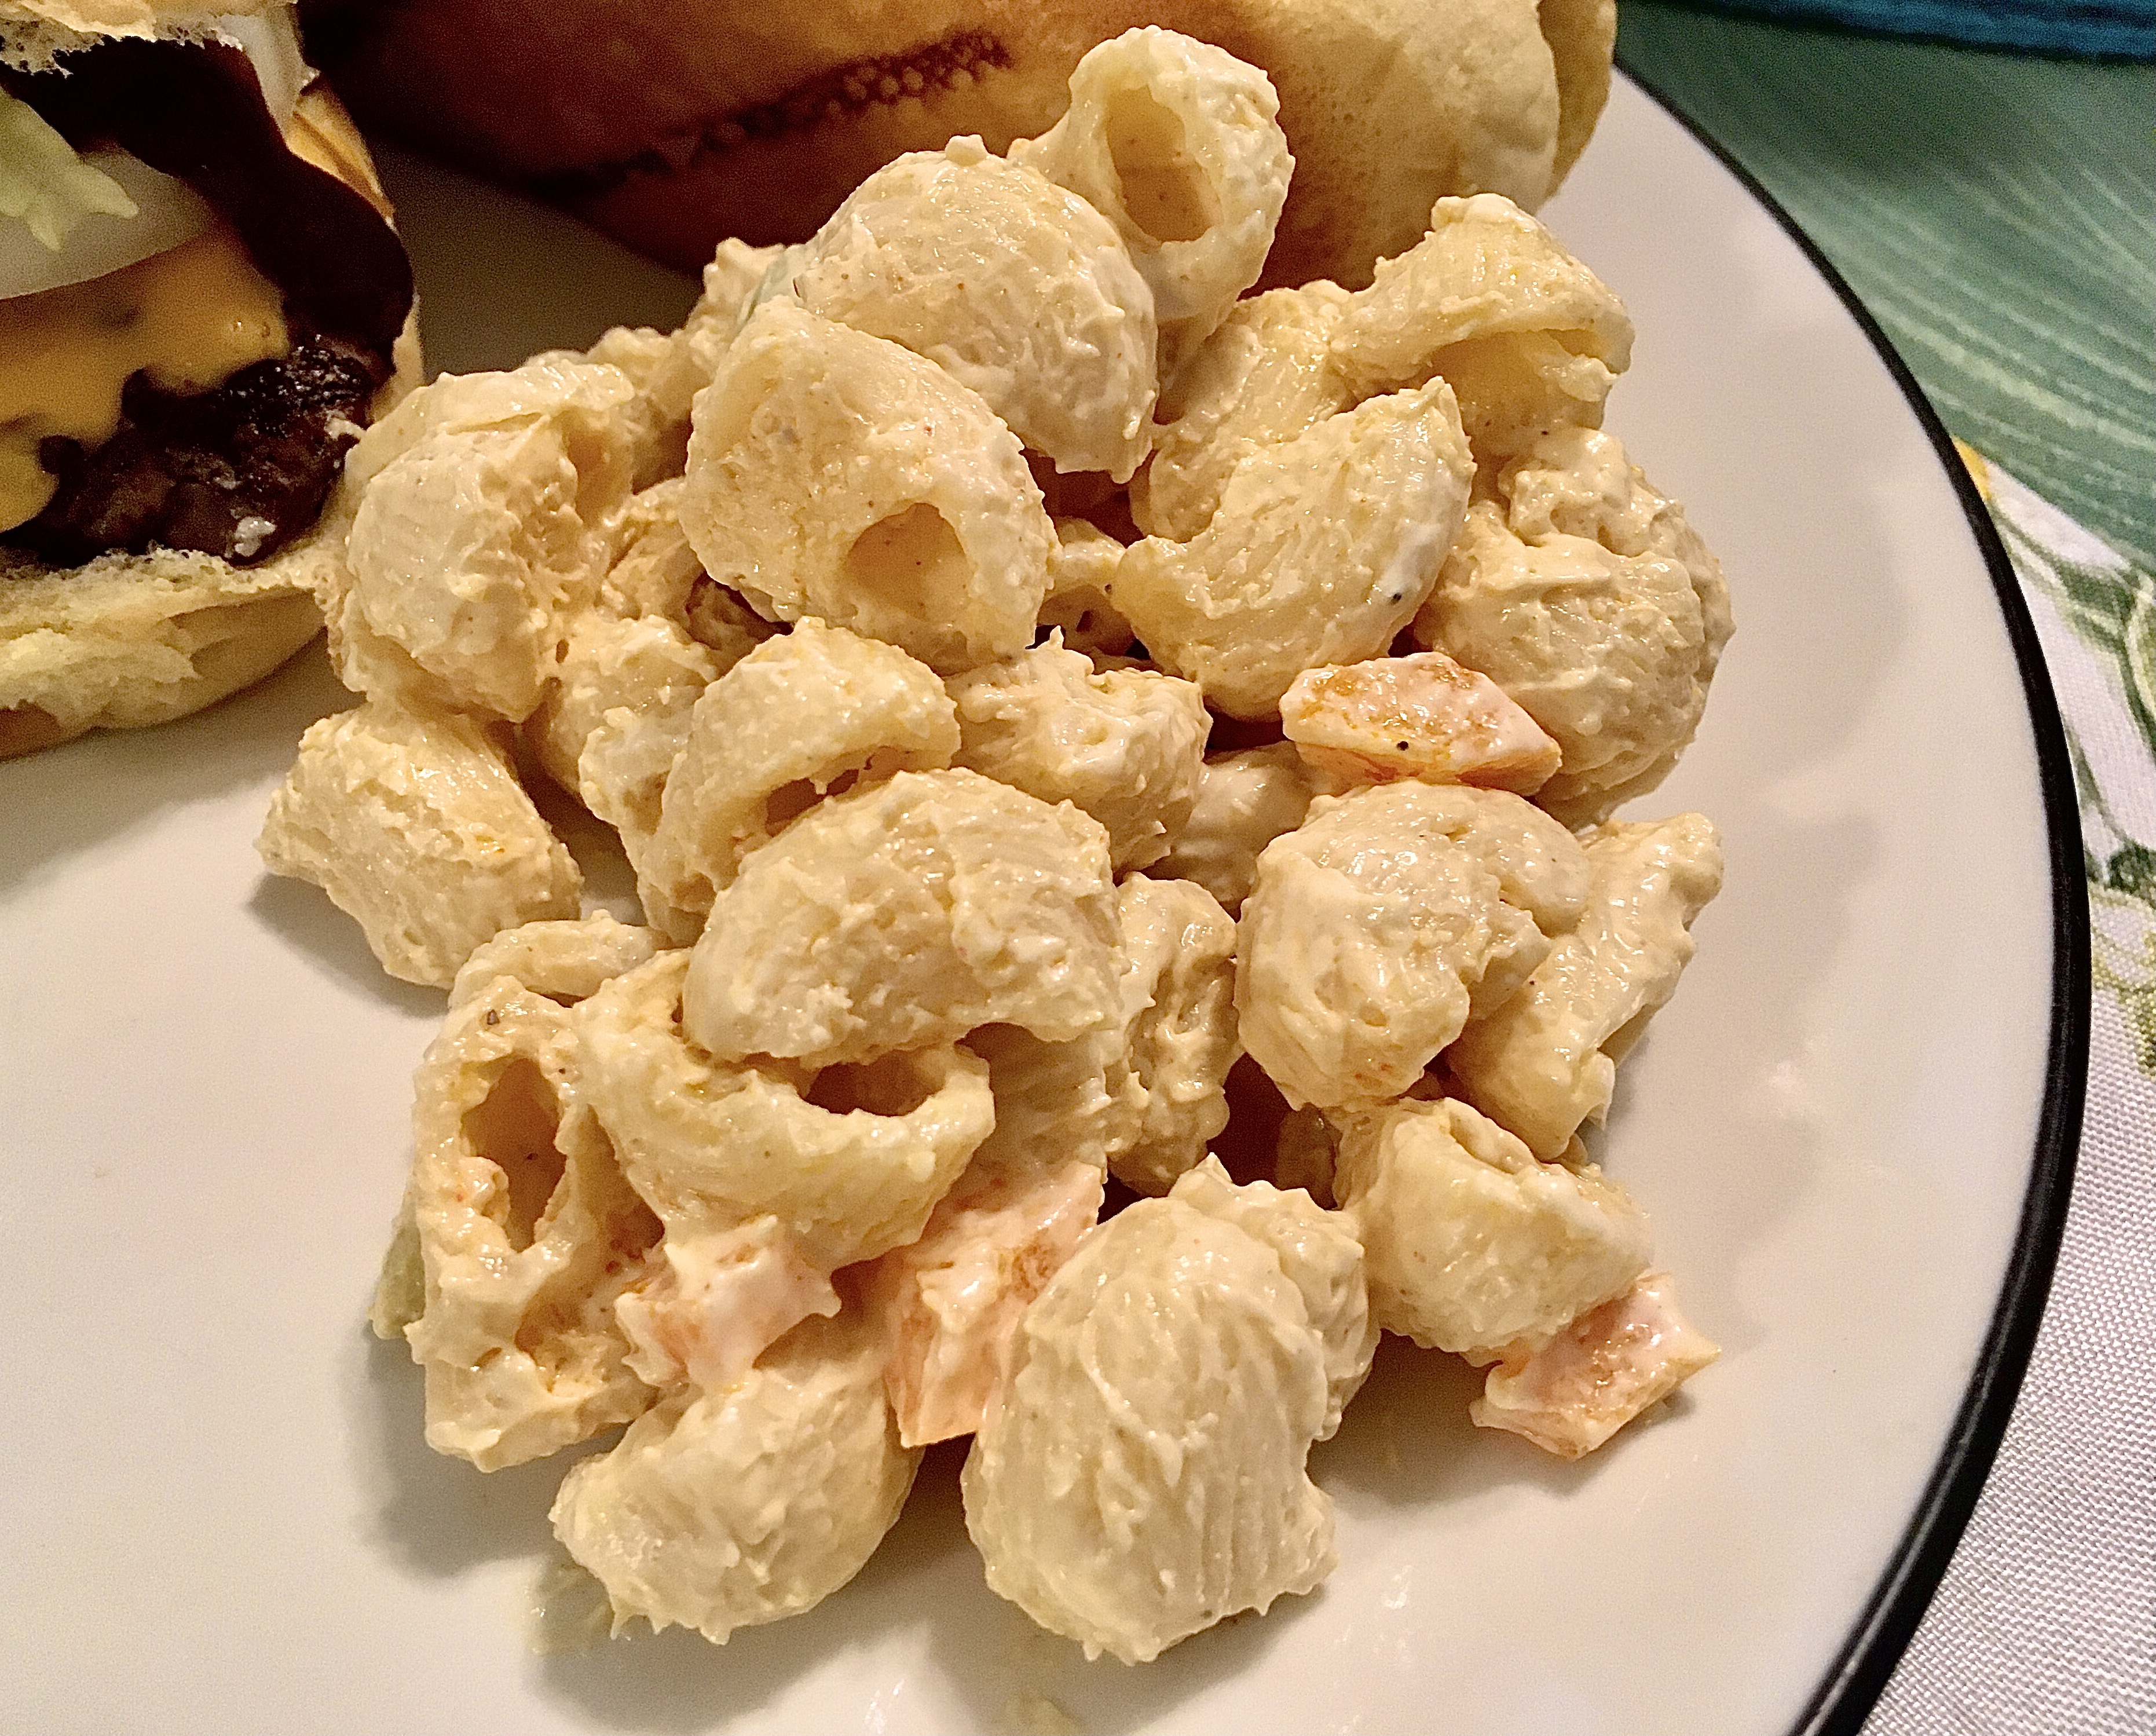
Jenn’s Awesome Macaroni Salad

One box macaroni, cooked “al dente” (I prefer elbows, pipette, or medium shells–something that your dressing can really cling to!)

1 bell pepper (preferably red, orange, or yellow), diced

1/2 red onion, diced

2-3 stalks of celery, cleaned and diced

For the dressing (for initial application):

1 – 1 1/2 cups mayonnaise

1/4 – 1/2 cup Dijon mustard (depending on how much you like it)

1/2 cup sour cream

1-2 liberal pinches of sugar 

1 tsp smoked paprika, plus extra for garnish

1/4 tsp black pepper

1/2 tsp garlic powder

1/2 tsp onion powder

  1. While pasta is cooking and all fresh ingredients are chopped, mix together all ingredients for the dressing and stir thoroughly. Dressing should be nice and smooth with a looseness to it so it can coat the pasta.
  2. When pasta is done, drain and rinse thoroughly with cold water to stop cook.
  3. As pasta continues to drain, pour a little bit of dressing mixture into container, then add drained pasta and fresh ingredients to bowl, covering with remainder of mixture. Toss well and cover. Refrigerate for at least 4-6 hours.
  4. When ready to serve, if more dressing is needed, create dressing with only mayonnaise, Dijon, sour cream, and sugar. Can make less than original application but try to keep ratio.
  5. Once ready to serve, garnish with some more paprika over top. Enjoy.

Makes 8-10 servings

Causing a flurry with Chimichurri!

As promised, gardening has become a part of our daily routine.

At about 5:30/6:00 am just about every morning, Matt slips on his sandals to go out and assess how our garden is faring. From his perspective: the romaine is thriving, cucumbers are starting to show progress, tomatoes and peppers are sprouting up taller and taller, and the herbs are growing like weeds!

In fact, in recent weeks Matt pruned some of the wilder herbs in our garden and brought his bounty into work at the end of the school year to give it away. We even had to give away some of our basil plants just to keep up with being able to utilize them in our cooking. It seems we may have created an herb monster.

But never fear, as Matt & I have made more conscious efforts to look up recipes where we could utilize the abundance and indulge in healthy eats. Our first culprit: parsley.

Now most of us know parsley as that herb that garnishes a semi-fancy dinner plate we receive at the diner. And if you have ever tried it (like I have), you know that it has a little bit of a bitter flavor on its own. I never understood why such a bitter herb was placed as garnish on a plate. Was it supposed to be a palette cleanser after the meal? Was it supposed to be something to just pretty up a plate? (Seriously, you don’t need fancy garnishes–they better be there to serve a purpose.)

For years I questioned what parsley as the main stair was good for. (I would later find out that during the Roman Empire parsley was not considered a garnish but more of a breath freshener….I still don’t quite understand how a bitter herb freshens breath. Not like they have parsley-flavored toothpaste selling like crazy!) And when we had an overabundance of it in our garden, Matt took to trusty old YouTube to find good uses for our generous supply.

Entering as our first contender: Chimichurri Sauce.

Yes, chimichurri has variations, mainly where you can add cilantro and/or oregano. But for all intents and purposes, Matt & I utilized our parsley with some garlic, red pepper flake (VERY little, I might add), apple cider vinegar, lemon zest, and olive oil to provide some liquid to the mixture. We also got to utilize our Cuisinart Food Processor, which I consider one of the best brands in all things food processor. (If you’re looking, check out their selection here: Cuisinart – Food Processors.)

While chimichurri can be used on an abundance of meats and vegetables for some brightness and flavor, this sauce shines on steak (even leaner ones like sirloin). Cover your favorite cut of meat with some of this flavorful mixture, add in some mini roasted potatoes and holy yum….you have one incredible meal!

As you fire up your grills this summer, get bold and try some bright flavors to change up those tried and true warm-weather dishes.

And as always, enjoy!

– Jenny V

IMG_9172

Chimichurri

1/2 cup parsley (aka a generous handful)

1-2 cloves finely chopped garlic

2 Tbsp apple cider vinegar

Lemon Zest (one lemon)

Pinch of crushed red pepper

Olive Oil 

Salt & Pepper

1) Add all ingredients except olive oil, salt & pepper into food processor or blender. Pulse until well incorporated and transfer to small bowl.

2) Add in olive oil to wet mixture, then salt & pepper to taste.

Makes 2-4 Servings


Toddler Tips: Literally Lateral

While Maxwell is not what I would call a picky eater, his aversion to certain textures has limited some of the foods we can immediately introduce that he will eat.

If he doesn’t enjoy the food that he is eating, we get the immediate finger scrape of the tongue. Foods that have joined that phenomenon are mashed potatoes, meatloaf, homemade meatballs, fish sticks, and most recently: slushed ices & teriyaki chicken.

In the initial stages of teaching Max how to eat, we would mainly rely on the reports from his daycare. If he was eyeing another kid’s pancakes, then we made sure to get him pancakes at home and test them out there. (The Kellogg’s® Eggo® Minis Buttermilk Pancakes have now remained a staple for breakfast all week long….with butter and syrup added on weekends for an extra treat.)

20190527_125633762_iOS

Maxwell and his pancakes!

When he didn’t want to eat his puffs for snack time anymore, we introduced Gerber Lil’ Crunchies® – Mild Cheddar with yogurt. (I also highly recommend Stonyfield® Organic YoBaby® Yogurt as it provides that daily dose of probiotics for your little one.)

And when lunchtime got especially boring in texture with Gerber® Plastic Tubs mixed with Earth’s Best Organic® Infant Oatmeal Cereal, we introduced more table food to satisfy the palette.

Eventually Max started to come around on food in general, but this took a little finagling and some observation on how Max preferred to try new things. He would try something, not like it, then we would have to take a side-step in our process and get him to like another item related to that initial food to get him to take that next step. Once he got accustomed to the taste of that other item, we then gave him the initial food again with slight modification. Funnily enough: it worked!

The conclusion became clear: in order to introduce new foods that may not be the biggest hit, Matt & I would have to make lateral moves.

For example, Max initially HATED scrambled eggs. I am not exaggerating that we attempted at least a dozen times before changing our tactics to convince Max that scrambled eggs were delicious. When scrambled didn’t initially work we decided to try a different style of egg: fried with a little cheese on top.

The fried egg with cheese became such a hit! At our local deli there was a fall special for football season: $1.99 breakfast sandwiches on Saturdays & Sundays. We would buy three bacon, egg & cheese sandwiches and offer Max the egg on one while we each ate one sandwich and picked the bacon off the third one. Once Max showed he was comfortable with eggs, the next move would be to then try making scrambled eggs with cheese. Those dozen failed attempts are now a thing of the past as Max can now devour about 2 scrambled eggs on his own.

When it came time to start trying to convince Max that vegetables were delicious, we applied the same concept. First, we took notice that Max would gravitate toward eating fruit & vegetable pouches that contained spinach in them. That made trying spinach our task. Next, we decided that to introduce the real thing, we would need a vehicle like a favorite sauce or flavor to get Max to try it. With Chicken Francaise as one of Max’s favorite foods, Matt & I agreed that incorporating spinach into the francaise sauce was the best move. The end result: Max inhaled his entire serving of spinach with gusto.

And when ground beef was a tough sell, the move became to try another sandwich, like grilled cheese. When the grilled cheese was well accepted, we then made Max a burger patty and his first cheeseburger was quickly scarfed down. Well, he only ate about half of it in the first go, with the other half broken up for him to bring to daycare for lunch the following day. (He ate that too.)

The method worked for Max as he didn’t feel pressured to like a new food right away. We instead found clever ways to come back to once detested foods and make them some of his favorites!

So for those picky eaters, I suggest trying the lateral move:

  1. Have a goal for what you want your child to ultimately eat
  2. Take a side-step by observing what they do like, or formulate a different approach
  3. Once comfortable in that step, incorporate that goal

When children don’t like food that you have worked so hard on for just them, the feeling one gets from watching them spit out that food can be slightly soul-crushing. You just want what’s best, I know. But once you figure out what tactic entices your child to eat and experiment, go with it.

Not every child will be comfortable with the continual offering approach and some will try anything once and like it. I don’t claim to be an expert, just a parent who wants their son to open up to the possibility of expanding their culinary palette. If this tactic works for you, then kudos. If not, don’t get discouraged. You will find out what inspires your child to enjoy food.

Or you may just have a picky eater.

Kids can be funny like that.

And as always, enjoy!

– Jenny V


A Garden of Love….and possibly some fresh mint

Before Matt & I became serious about being parents, we had talked about our hopes and dreams for things we wanted in our first home. Jokingly (but not really a joke) we needed at least 1.5 bathrooms. We wanted room to expand our family, a place we could express our own sense of style and flair. No pool (even though since we now have one we have come around on the idea of swimtime during the summer) and a space to throw summer barbecues whenever we could.

But more than anything else, Matt wanted us to have an herb & vegetable garden that we could use to our advantage. When we needed that little bit of basil or possibly a fresh tomato, what better place than to grab the necessities from our own backyard? Prior to our house-hunting whirlwind we had attempted a bucket garden at our year-round rental. We used big buckets with potting soil and wrapped chicken wire with stakes around it to keep rabbits and squirrels from tampering with our project.

While our attempt at vegetables yielded only one little measly yellow squash plant with fungus on it, we found that the herbs were a lot more abundant! (And you know, no fungus.) Thyme, rosemary, and dill grew like wildfire from just a few seeds, so we found ways to incorporate those herbs into more of our dishes. Chicken dishes, tuna fish, homemade tomato sauce….we found ways to use as much as of it as possible. Eventually we just couldn’t find the time to keep up with pruning and drying out our abundance, so the garden fell to the wayside.

Fast forward to now….where Matt & I finally have the home, space, and enough time to work on such a large project. And so since this idea was Matt’s brain child, he set out to bring this garden to life.

If you had looked at the list of our YouTube searches, you may have chuckled a bit at seeing “How to Build a Keyhole Garden” in between “Little Baby Bum” and “Baby Shark”. We discussed what herbs and vegetables would work best with the way we cook, as well as looking up articles and videos on the best options for growth.

With a goal in mind, Matt set to work on creating on our garden project. First came a handful of Home Depot trips to select the correct lumber, chicken wire, topsoil, and potting soil all while scoping out potential plants. Next, Matt started skillfully building a keyhole garden, making sure that the ground was even before setting down the cardboard for the bed of the garden and loading it with the proper soil mixture.

20190508_213349618_iOS

Starting our garden

And finally came the best (but most important part): selecting what we should grow in our garden. We wanted to have vegetables and herbs that we normally use in our cooking, as well as a few fun ones to try out in new recipes.

Of course the herbal basics (basil, rosemary, thyme, oregano, and parsley) were automatic shoe-ins for the main part of the garden bed. As a bonus, we added lavender, lemon balm, and sweet mint to round out the lineup. That holy trinity will be beneficial come iced tea/lemonade recipe time. And for that savory factor, lavender is one of the key ingredients in Herbs de Provence.

For vegetables, that became a little trickier but not impossible.

One of the best basics for a garden are tomatoes (even if it is considered a fruit). We decided on Roma tomatoes because they’re smaller than Beefsteak or Jersey, but are considered a good tomato for making homemade sauce. And usually smaller tomatoes are easier to grow, which means if this goes well maybe next year we’ll add cherry tomatoes to the mix.

Next came cucumbers, as my husband is half-Greek and I made pretty good homemade pickles using my great-grandmother’s recipe. There would need to be two types of cucumbers in our garden as the seedless are better for salads and tzatziki while Boston Pickling cucumbers are better for just that: pickling. And so we added those to our list.

With peppers we realized that while red bell are perfect for me as I am minimal on the heat and more on the sweet, Matt could get more into harvesting hot peppers for potential chili and just spicing up a few of our favorite dishes. By accident instead of grabbing four Tabasco pepper plants, we grabbed two Tabasco, one red chili, and one Santa Fe Grande plant. If all goes well, there will be very little need to replenish hot sauce.

For our final plant we had initially talked about spinach as Max has shown an interest in finally eating a green vegetable. (He ate spinach in Francaise sauce, which was a small victory in our house.) But since Matt could not locate a spinach plant anywhere, another great option was to attempt fresh romaine. With a handful of plants, we could pluck ripe leaves from the plant and have a salad without completely uprooting the whole plant. Sounded like a great compromise. Also, spinach is almost always on sale near us so that’s never a problem.

20190517_204257750_iOS

Ta-da….we have a garden!

The lineup was complete and with some configuring (and eventually re-planting of some of our crops), Matt & I worked together in bringing our garden creation to fruition.

We’re waiting with bated breath to make sure that crops start growing so we can harvest our end product and I can’t wait to share what we make when/if we do!

Stay tuned for potential recipe adventures and stories of our gardening experience.

And as always, enjoy!

– Jenny V


It’s a little bit butternutty….

While I did it for the sake of Max’s little tummy at the time, adjusting to a dairy and soy-free life wasn’t easy.

With the constant need to read ingredients the process of eating became more of a challenge, more like an Olympic sport! Every item placed in the cart at the grocery store was scanned for any mention of dairy and/or soy. (I recommend the ShopWell app….saved me many times over at the grocery store and you can adjust it for just about any type of dietary restrictions.) I had to advise every waitress when I went out to eat of my dietary restrictions, sometimes even reading over a menu several times before I walked into the restaurant.

I lived with the feeling that it must have been frustrating for the cooks in the kitchen to have to adjust my meal, just because I didn’t want my son to cry in pain from any dairy or soy in my food that would get transferred to his breast milk. This frustrated me to the point that I really didn’t want to eat out at all until Max was cleared or we stopped breastfeeding. (After about nine months, I was able to finally go back to normal when Max started eating solid foods and showed no reactions as I reintroduced dairy and soy into my diet.)

But aside from that I will admit: I had missed dairy on occasion. There were moments I wished I could have a big slice of cheesecake, a plate of buttery Yukon Gold mashed potatoes, or a big bowl of fettuccine alfredo. Sure, there were alternatives like the Daiya products to give me the feeling that I was eating cheese or ranch dressing. (By the way, their pizzas and macaroni & cheese were pretty decent for not having any gluten, dairy, or soy in them.)

More than anything though, I really missed a good pasta in a cream sauce. Fortunately, I was able to locate this gem of a recipe courtesy of Cookie + Kate, which used pureed butternut squash in vegetable broth to replicate that decadence one craves when you order anything in a cream sauce. (And another added bonus aside from being healthy for all you non-meat eaters: it’s Vegan!)

You can check out the recipe on the Cookie + Kate website here: Creamy Vegan Butternut Squash Linguine with Fried Sage. And if you’re not that big into linguine, I recommend using fettuccine as evidenced by the featured photo. It was a delicious substitution and I mean, who doesn’t love fettuccine in a cream sauce?

While I am not a vegan or vegetarian by any means, this dish at the very least satisfied my palette. With my diet back to normal, I would more than likely add some heavy cream and possibly some Parmesan to give it that extra kick of salt. Yet I learned that if you need to be healthy, healthy can be delicious.

And as always, enjoy!

– Jenny V

Spicy Tips: Back with a fun Iced Tea Tip!

It certainly has been a while since I have found time to sit down and write out new recipes. Being a parent has that ability to deplete any time you had hoped you would have to share your thoughts with others. (Just looking at the amount of drafts I have yet to finish is enough to give me palpitations….I need to do better.)

But never fear, I am back with a fun tip for those looking for ways to quickly make one of my favorite warm weather drinks: Iced Tea!

Now I have done the sometimes laborious process of making tea with hot tea bags, followed by whisking in honey to the warmed mixture to incorporate and a whole lemon or two to make one delicious drink! Yet sometimes, time is of the essence and if you’re short on time but still want to make that summertime nectar without using a pre-made mix, I’ve got a great solution!

So one of my favorite shortcuts to making an easy iced tea is all thanks to Lipton® and their fabulous Cold Brew Bags. (They’re in just about any supermarket and you can click here for some info: Lipton Cold Brew Bags). One bag per 4 cups of water (you will probably use 2 bags per pitcher, unless you want to add a flavor) and it only takes about 5 minutes of brewing time before it’s done. If plain tea isn’t enough and you want to add a flavor to it, you can always brew a few cups of hot water and add your flavored tea there, then mix the two together.

And if you’re like me, you want to add some flavor like lemon or honey/sugar to that mix. For a nice little hit of lemon flavor, I have to admit that my name is Jenn and I am an addict of the Arnold Palmer. For those of who you don’t know what that is, it is half iced tea and half lemonade mixed together. But for this purpose, I would recommend using maybe 1-2 cans of Minute Maid® Lemonade to one pitcher. (Not the frozen kind, but a can from a 12-pack. You can also get a carton or container of lemonade of any brand you like and adjust the amount of lemonade you put in to your liking.) Not quite the half and half of an Arnold Palmer, but leaves the iced tea with a nice sweetened lemon flavor that I know most of us love.

More importantly, it is a way to add sugar to your drink without the sweetness being too much. The lemonade blends nicely and if you still find that the lemonade makes it a little sweet for you, always remember the best part about iced tea are those ice cubes that clink around in the glass when you go to take a sip!

And as always, enjoy!

– Jenny V


It’s All About Adjustment….

2017 was certainly a whirlwind of events for me, but I am back and ready to share new recipes!

Of course, those recipes may need to be slightly adjusted now. You see once our son Maxwell was born and I had taken to nursing our son rather than formula feeding, Matt & I ran into some potential dietary issues. As I could eat anything I wanted, Max’s digestive system had not yet developed and he started to exhibit signs of discomfort. One night of screaming baby and a pediatrician’s office visit later the culprit was simple: Mommy’s eating habits were taking its toll on the little guy. The only solution available was to start eliminating foods from my diet and see how it would affect Max in the long run. First to be eliminated were dairy and soy.

Now for those of you who aren’t aware, trying to go dairy and soy free felt damn near impossible at first. Why? Because if you read the labels on several of your favorite foods, you will find either one or both of those ingredients in it. Bread, bagels, frozen waffles, Onion Soup Mix, Gravy Master, Chicken & Beef Broth, most Asian cooking, Coffeemate flavored creamer, etc.–I had felt as though I was being put in food prison yet again. The first time for gestational diabetes in my third trimester, which is another story.

But I was determined to breastfeed and so I took to the task of restructuring my diet. Matt & I discussed more fresh food options for our meals. I incorporated more protein into my diet and cut out dairy in cooking. I read the labels on the current items in our pantry to understand what I could still incorporate into my diet. (Happy to report that pasta is still a possibility for me!) When I went food shopping I ventured into the specialty food aisles for myself. And while Stop & Shop has a limited selection of specialty foods, I was still able to pull together enough items to create my own menu.

Yet I missed baking….and unfortunately a lot of my recipes called for items such as milk or butter in the ingredients. I didn’t even bake my annual New York Cheesecake for Christmas Eve because I wouldn’t have been able to eat it. Fortunately though, Max’s condition began to improve and he didn’t look as pained as he used to. If me giving up dairy and soy meant that he would be happy, then I would do that for him.

As an alternative, I started to really take a look at my baking recipes and find ways to substitute ingredients for the troublemakers. Now for those who remember one of my specialties is Banana Chocolate Chip muffins. You can find my recipe for that here: A muffin a day makes a happy husband! Of course that has milk and chocolate chips (with milk in them) so I substituted the regular milk for rice milk (you can also use almond milk if you’d prefer) and instead of Nestle Chocolate Chips, I found the Enjoy Life products have created an Allergy-Friendly chocolate. With those two substitutions I made my muffin batter, poured it equally into the 12 baking tins, and prayed that they would come out just as good as my original recipe….and they did!

So my advice is this: when you can substitute to make it more allergy-friendly, DO IT! I promise it was difficult to tell the difference in these muffins versus a regular batch.

And as always….enjoy!

– Jenny V

Spicy Tips: For An Early On Mom-To-Be

Well it’s official: Matt and I are expecting our first little one in November!

Of course when I first found out, it was all over a rather drastic change in my eating habits. Matt had been the first one to notice that the beautiful half-rack of ribs that he had made me for dinner one night only warranted a nibbling on 2-3 ribs before I announced I couldn’t eat anymore. I kept asking for dinner later rather than right when I came home, when I would normally be ready to eat my hand! My sleeping habits also took a change when by 9:00 pm I was barely able to stay awake. And so with Matt’s encouragement I took a test one morning and over three months later here we are!


Since I am starting my second trimester, I am happy to report my eating habits have started to improve. But if you endured the food aversions like I did, then meats like chicken and beef became your arch-nemesis. I couldn’t even stomach the thought of chicken for almost a solid month and a half until I tried chicken breast at two family events. There were minor cravings for junk food but mostly I stuck to the staples that I knew I could handle without too much fuss.


As I am finally feeling a little more peckish these days, I thought I would share some of my tips that got me through the first trimester. Granted, they may not work for everyone but hopefully a few of them do help those mothers-to-be just starting out:


1) Keep it plain (and hopefully healthy). I know, not always the easiest thing to do when you have been cooking with lots of spices and flavors. But during that first trimester the thought of food doesn’t always sit right with most women. You may not throw up, you may have a constant wave of nausea, or you may be praying to the porcelain gods. Seriously, keep food plain. Pasta is good and if you feel like a little bit of sauce, add just a little bit. Bread, crackers, tons of water, fresh fruits and veggies–these are the things you want to eat the most of. If you want meat keep it simply seasoned.


2) Don’t be afraid to eat the same thing over and over. When you find a food that you can handle you may be eating it several times in a week. For me it was peanut butter and jelly sandwiches, unsweetened applesauce, and lots of tomato soup. It felt like for several days a week (minus a few where I did get cravings) these were my main staples. Just be prepared to stick to a regimen that you know your stomach can handle.


3) Go with your cravings if you get them. On the days that I would get a craving during my sick period, I went with it! My husband has started to understand that if I crave cheese fries or a chocolate milkshake, it’s good to cave to my craving. It means your body is obviously wanting something from that craving. For the milkshake it reminded me that I more than likely needed more calcium in my diet. With the fries I needed something more filling in my system than just fruits and veggies. You may pay for the cravings later but still go with it. In early pregnancy you can’t avoid the changes that are going on in your body. But more importantly: make sure that what you crave is okay to eat, so talk to your doctor about food “dos and don’ts”.


4) It is alright to not eat, but keep hydrated (and you can do this with more than just plain water)! I mean this especially since this was drilled into my head: water is vital. I went days eating minimal. I couldn’t help it when the thought of food would turn my stomach in the nastiest of ways. But water? Yes, you need that. You need that every day in mass quantities. If you’re like me you will get sick of just water, so it’s okay to change this up a little. To settle my stomach I had my Ginger Peach tea with some lemon and honey in the mornings and an occasional afternoon cup (using the same bag–because limiting caffeine is important). Juice with club soda or seltzer was a great way to cut the sugar down and get some light effervescence into my diet. And lemonade? Oh that is just a beautiful citrus bevvy that I would gladly drink every day!


5) Getting Sick = Healthy Baby. I can’t take credit for this adage but it’s important to share nonetheless. Every time I paid for my food choices I had to keep remembering that I was getting sick for a good reason: it means my body is producing the hormones needed to help the baby grow. Not everyone deals with morning sickness and some get it a bit too much, but for me it was a reminder that my little one is working hard to get to the proper size and that my body is always in a constant state of adjustment to accommodate that.


Whether these tips work for you or you find your own way, just remember that you know your body best. And once you get out of the morning sickness phase, be ready to eat with a vengeance! (Case in point: Matt walking into the house to find me eating a large order of cheese fries and a double Italian Hot Dog. The bit of ketchup I had on my face must have been quite endearing.) And most important for moms-to-be….


Enjoy every moment of it!


– Jenny V

Francaise: Not just a chicken dish

While I am a healthy mix of nationalities (and according to my recent genealogy research a few I didn’t know about), I was practically raised by my dad’s side: mainly composed of English, German, and Italian family members. I can credit my family for being a key factor in my appreciation of food and cooking. And especially with Italian food, I have developed a rather particular palette. Because while I’m sure a good portion of the Italians I know would pick a tomato-based dish as their favorite, mine has always been and always will be Chicken Francaise. (Fortunately, the version of Francaise we made for this post does have tomato in it.)

In fact, I love Chicken Francaise so much that during my freshman year in college when the cafeteria had failed spectacularly in their attempt to make it (they added raisins and made it sweet….NEVER add raisins or make it sweet, it’s gross), I went home that weekend and asked my dad for an emergency dinner at one of our favorite Italian restaurants. I still shudder thinking of those raisins….I stress that they should NEVER be added to a savory, lemony dish…:::shudders:::…but I digress.

About three years ago, approximately April of 2013, Matt and I opted for takeout from our favorite local Italian joint. I remember the date because Matt encouraged me to order anything and everything from the menu for reasons unbeknownst to me. It was after the fact that he admitted that that was the day him and his mom were in a jewelry store picking out my engagement ring. That day in particular, I had a craving for Shrimp Francaise. I had tried the chicken, I had even tried a flounder version from one of our favorite seafood restaurants. But shrimp? Never.

Fast forward to a few years later, Matt and I decided to try making Shrimp Francaise to add some new dishes to our repertoire. The end result was a delicious lemony and buttery seafood dream, with some fresh sauteed spinach and cherry tomatoes that were bursting with flavor! Seriously, cooked cherry tomatoes–look into it and do it. And as for spinach, buy it fresh in bulk and you will yield many meals: a nice salad, a sandwich topping, and of course, cooked in Shrimp Francaise.

Fun plays on classic dishes are always a great way to spice up your culinary technique in the kitchen. This one is definitely a keeper.

Enjoy!

~ Jenny V


Jenn & Matt’s Shrimp Francaise 

1/2 lb. shrimp, cleaned & fully peeled

2 eggs, whisked

1 lemon, juiced

1 tablespoon lemon juice

1/2 lemon, sliced thin 

1 container cherry tomatoes

1-2 healthy handfuls fresh spinach

1/2 cup white cooking wine

1 cup chicken broth

1 – 1/2 cups flour

1 tablespoon flour

1 tablespoon butter

1-2 tablespoons paprika

1/2 teaspoon black pepper

Salt, to taste


Directions:

1) In a small bowl, mix in eggs and tablespoon of lemon juice. In a small pan, mix flour, paprika, and black pepper. Dredge each shrimp through flour mixture, then egg mixture. Place shrimp in pan over medium high heat with a little oil in pan. Brown on each side and let it cook almost all the way through, then remove from pan.

2) Into pan, add tablespoon of flour and butter to create a roux, then add white wine, chicken broth, squeezed lemon juice, and tomatoes. Before the tomatoes begin to burst, add the spinach and shrimp. Place lemon slices over top.

3) Cook until spinach begins to wilt and  tomatoes burst. Remove from heat, season with salt if desired, and serve over pasta.


Spicy Tips: The Perfect Chicken Noodle Soup

Spoiler Alert: Be prepared for the onslaught of chicken dishes!

When the fall season hits, I can’t think of anything better than busting out the Crock Pot and making dishes that assault your sense of smell when you return from work that day. Also, the house just feels warmer and more inviting that way. Trust me, there’s nothing better than after a long day of being on the phone with an insurance company to argue a client’s claim, to walk in and smell the love that your dish has been making while you were away. It’s a calming force.

So before I wax poetic on slow cooking, let’s get back to the topic. Namely, Chicken Noodle Soup. I know we all have a recipe that we follow. We all have our own tricks and tips that personalize how we create this cold-weather classic. And so I want to share a few of my own, as there are a few helpful suggestions to guarantee positive results.

 
1) Make sure to flavor your broth!

When you’re sick, Chicken Noodle is simply the best soup (in my opinion) that can bring you out of that non-hunger phase and nourish your soul. It has the protein from the chicken, the vitamins from the vegetables, the noodles to help fill you up, and most importantly: that nice salty broth to break through your temporarily altered taste buds. So while I love adding a healthy dose of poultry seasoning, don’t forget salt and pepper! There’s nothing worse than all those delicious elements in a bland broth. And taste as you go….I cannot stress that enough.


2) If you can, make your own stock.

You can always buy chicken broth if you’re in a pinch, but I love making my own stock. When Matt & I purchase a whole chicken, we first roast it and eat the breast for dinner that night. Then, strip the meat off the chicken down to the bones, as the meat will be perfect for soup when you process and chop it. And in the Crock Pot, put that carcass in with enough water to cover the top of the bones, then lid on low and slow for 8-9 hours (and sometimes longer).

Once the carcass starts to fall apart in the stock, that’s a good sign. When done, remove the bones and my final move is to place a paper towel in the strainer and ladle in broth through that into a container. The stock will retain some fat, but this helps keep bone fragments out of your broth. Use a wooden spoon to push around the liquid to get it to strain. You may replace the paper towels a few times as eventually the fat will pool enough to where nothing gets through, but that’s okay. This is a messy (but rewarding) process. You get a clearer broth this way.


3) Saute your veggies before you put them in and make sure they’re fresh!

I keep my veggies standard: celery, onion, carrot. You can add fun ingredients like leeks or fennel, but I love the classics when it comes to chicken soup. Now, you can always just throw the veggies in raw and allow the slow cooking to do its magic, but I love getting a little bit of color on those veggies. You won’t necessarily get a bite of onion as it melts into the broth, but you will taste a hint of it. The carrots will practically melt in your mouth, as will the celery. You want to let them cook the longest in your broth.

So for the best result, a little bit of oil in a pan, saute for less than 5 minutes, and add the veggies first to the broth.


4) For best results, make the noodles separately (and keep them that way).

This is more a rule because Matt does not like soggy noodles. And it’s a good one! The noodles are always the final ingredient to add to the soup, because once they’re done the soup is done. And then once in the fridge, the noodles keep expanding the longer they sit. And instead of soup, you get this noodle dish with soup elements and minimal broth. So instead, I tried a new trick: I cooked the noodles alone, strained them, then placed them first in the bowl and ladled the soup over the top.

When I had to clean up and put the rest in the fridge, I made a decision to keep the noodles in a separate container. You get more control over the amount of noodles you want in your bowl, and the broth remains intact when you heat it up.


5) Low and slow is the best way to go!

I have forgotten the most important tip of all: the slow cooker is the best way to make Chicken Soup. Flavors are best when they have a chance to meet and meld for a while. You don’t want to rush this step and if you have the time, take it. The depth of flavor you can achieve from that low and slow technique is second to none.


And as always….enjoy!

– Jenny V